How To Install Training Wheels
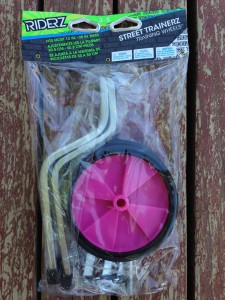 This week at the local thrift store, I found a deal on a couple of bikes for my girls. It was easy to tell that the bikes at one point had come prefabricated with designer training wheels and hardware. The only remnant of these training wheels were the leftover hardware still on the bike. I decided to pick up a set of training wheels, and bought the least expensive pair for $9. I will be detailing the instructions on how to install these training wheels made by Riderz.
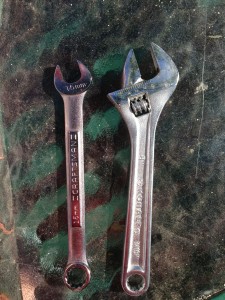
TOOLS YOU WILL NEED
1) 15mm Wrench
2) Adjustable Wrench
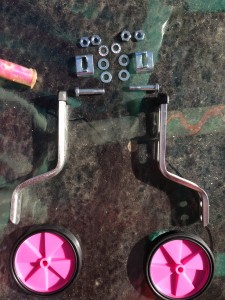
Hardware Included
2- Small Bracket Brace Plates
4- Nuts
4- Washers
2- Serrated Washers
2- Shoulder Bolts
2- Vertical Brackets
2- Wheels
Installation Instructions:
Attaching Wheel to Vertical Bracket
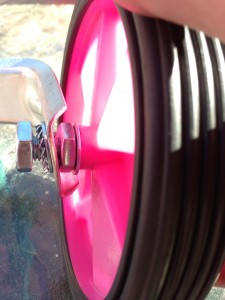
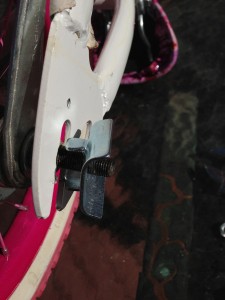
Assemble pieces on shoulder bolt in the following order:-Wheel – Flat Washer- Nut – Vertical Bracket, Flat Washer, Serrated Washer – Nut
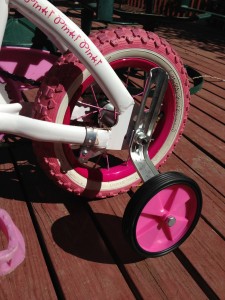
Attaching Assembled Training Wheel and Bracket to Bicycle
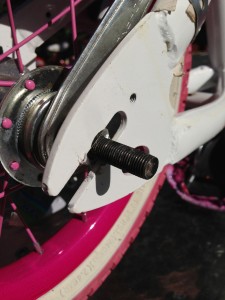
1. Remove axle nit and washer from bicycle axle.
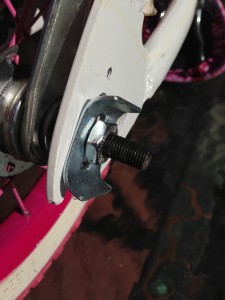
2. Place Bracket Brace Plate over bike axle by inserting the tab into the open space of the bike frame.
3. Place assembled training wheel onto bracket brace plate and adjust bracket height.
No nut between Bracket Plate and Vertical Bracket
**THIS IS INCORRECT**
4. Replace axel washer and nut, and tighten securely.

great instructions thanks I would have never got that on without you
Thank you for the tutorial!! I could not get it for the life of me. Now my little guy can ride!!! Thanks again.
I am still having trouble with the wheel. I can get wheel screwed & tightened, but then it does not turn/spin, when I loosen it so it can turn/spin, the wheels fall off after a few seconds of riding. How can I get that happy medium where it is securely tightened, but still spins??
It doesn’t work first of all if you look at the picture of the parts the screw doesn’t have threading all the way down But the assembly picture where it tells you the order of the nuts washer and lock washer and bracket and Axel the screw on that picture has threads on the screw
Thank you so much!i had it wrong twice until I decided to search the web and found your post! Little one is ready to ride!
hey thanks a lot
don’t know if its just mine
but literally no instruction in my riderz
couldn’t figure out the placement of the serated washer
know they re dads out there
that appreciate it..
and four year old girls..
thanks again
eric
First of all the shoulder bolts they give you doesn’t have the threading all the way down unless you go buy shoulder bolts that do so without those this doesn’t work.
My problem is that the axle is not long enough to put the bolt back on when I add the training wheel and bracket. What option do I have? It’s for my granddaughters birthday today.
It works, but not as shown on the picture. There is instructions on the inside of the cardboard attached to the plastic bag. Put the washers and nuts in the right order and you’ll make it work. The wheel ends up being secure and free to spin.
Thank you for doing this as it is wry helpful as the kit has no instructions. Great instructions and pictures from you. Couldn’t have done it with out this!!
You are truly heroic. My kids lost the instructions while zealously tearing open the package to help me install these training wheels. An hour later I found this. Thank you
USE THIS!!
thanks so much- these were great. There were no instructions in the set we bought so this was very helpful!
Also- make sure the training wheels are the level of the tires. If the bike floats the brakes won’t work!!
you’re instructions are not very good. not detailed enough.
My granddaughter and I love you. We were struggling with these, and you had everything explained beautifully. Thanks!!!
Very good and understanding, thanks. So much.